Imagine you have a web map and some text describing it. Often the description contains names which you might want to link to the actual map features (map reference).
We’re very happy to introduce functionality that lets you do exactly that!
Here we assume you already have a Web GIS and at least one web map there. If not, head to nextgis.com to create one, it just takes minutes. Here are the steps to create your first map reference:
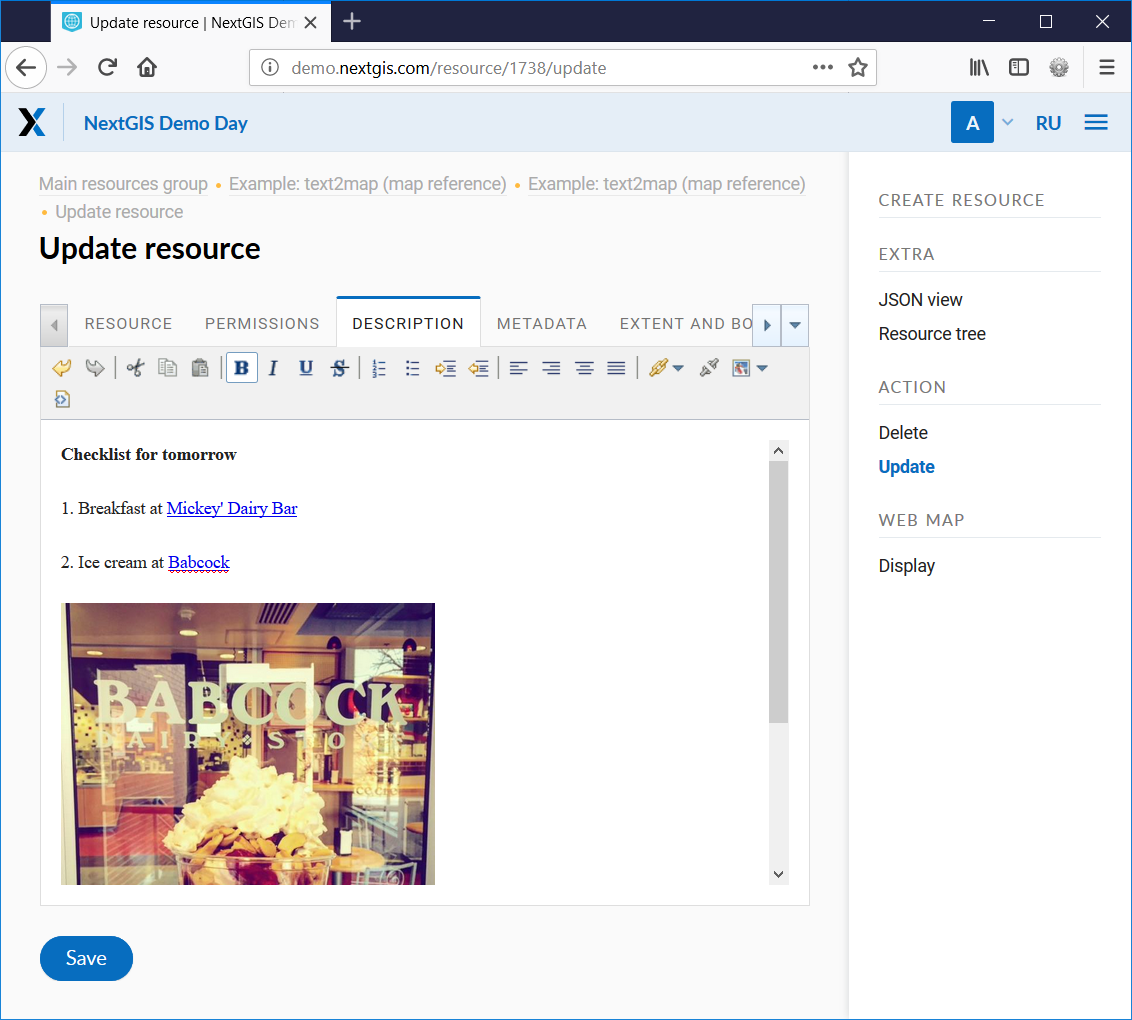
Every resource at nextgis.com including web map has a description. Description may include images and text which you can edit and format using a visual editor.

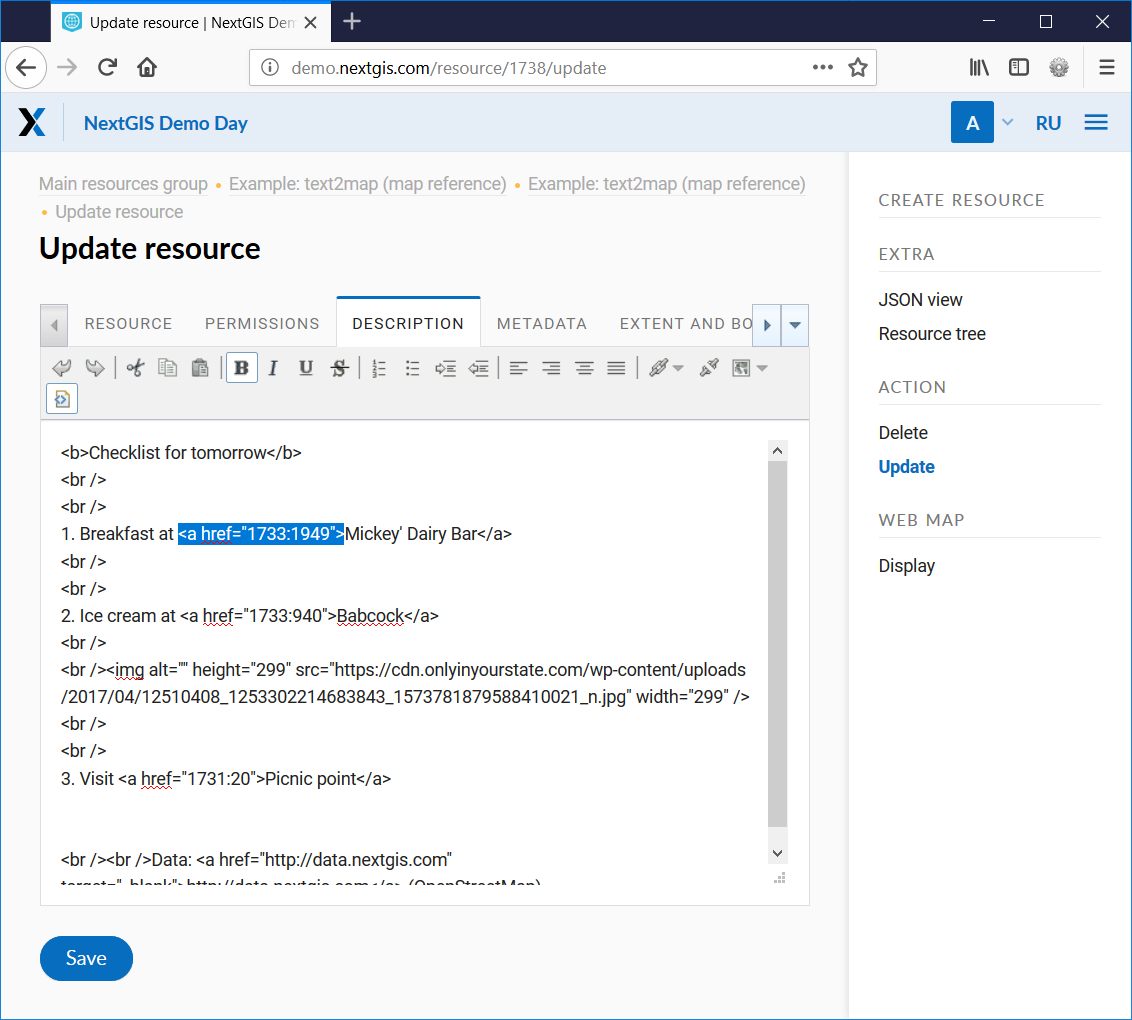
Switch to HTML view of your description, and use layer resource ID and feature ID to link to a particular feature.
Your description may link to features from different layers.

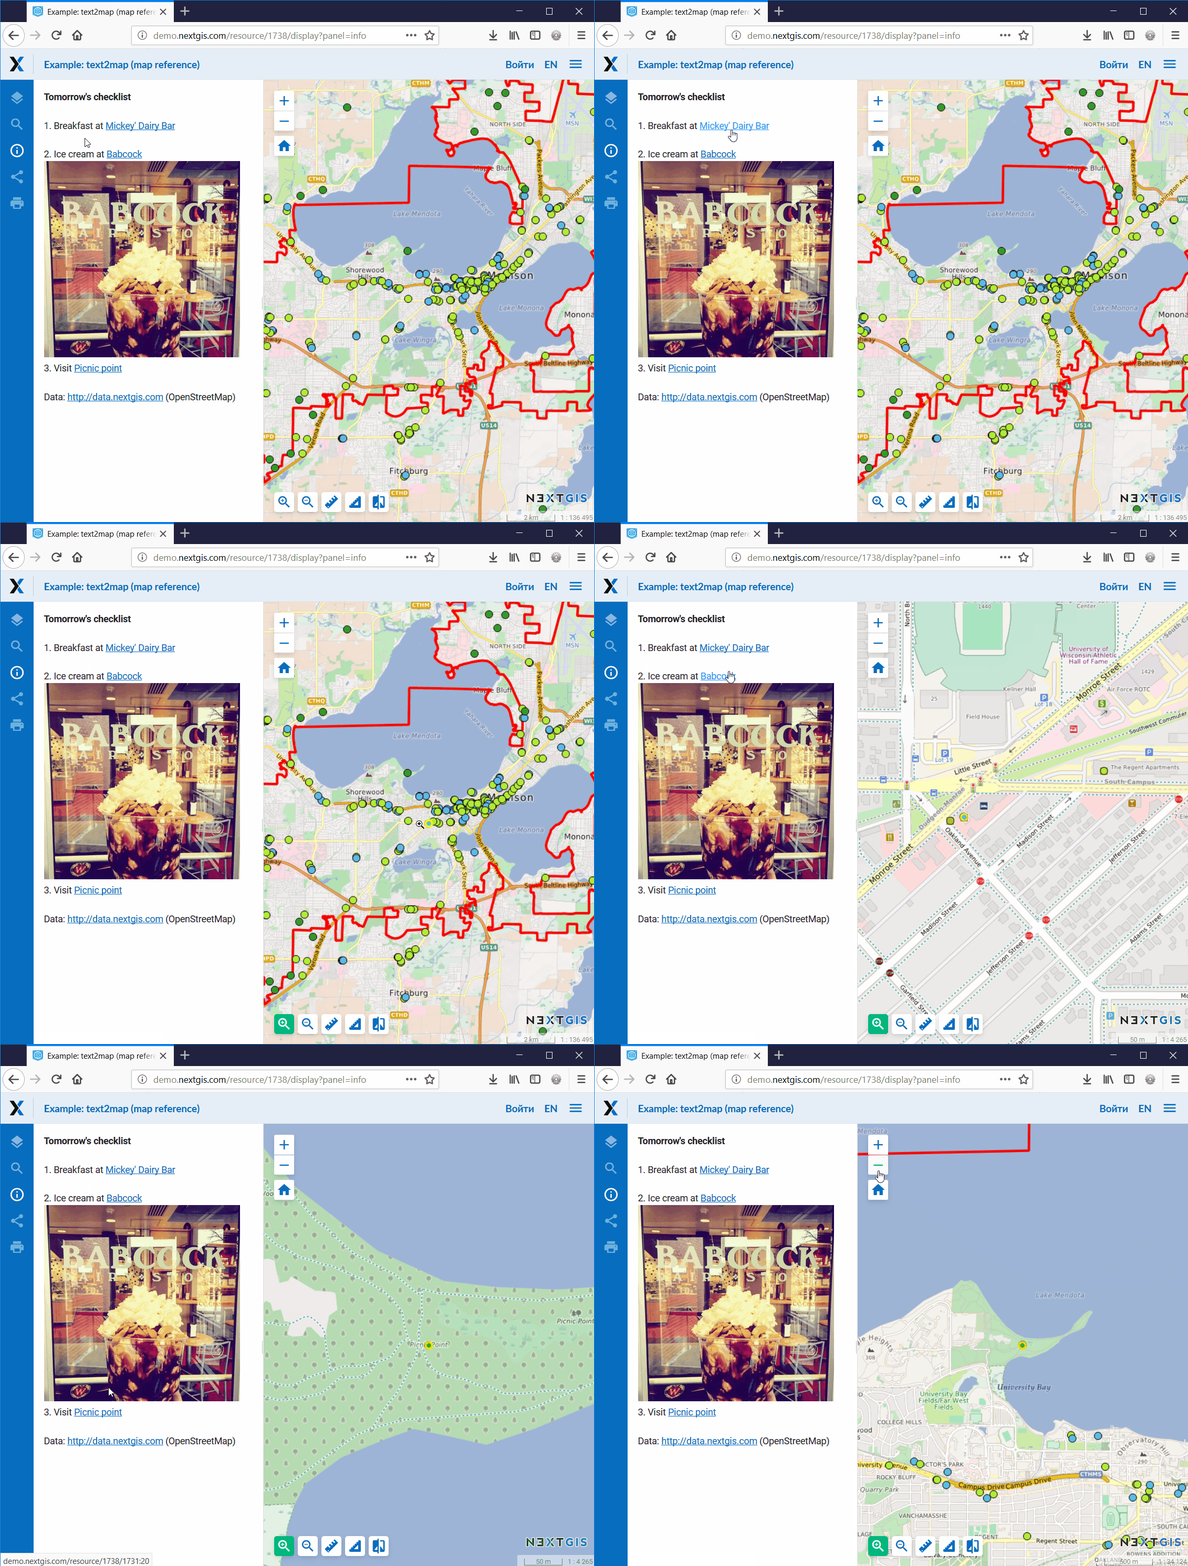
With new references, clicking on a link will immediately move and zoom your map to the linked feature.

Thanks to the recent update, you can now share your web map with a particular panel open (search, share, description, etc.). For example, if you want your users to see the web map you shared with the description open, the link will look like this:
An example above was a simple one. Now see how this functionality is used to build an interactive historical map reference for hundreds of features (see detailed description).
The development of this functionality was sponsored by Institute of World History. If you lack certain tools in our platform – let us know, we’ll be happy to help.